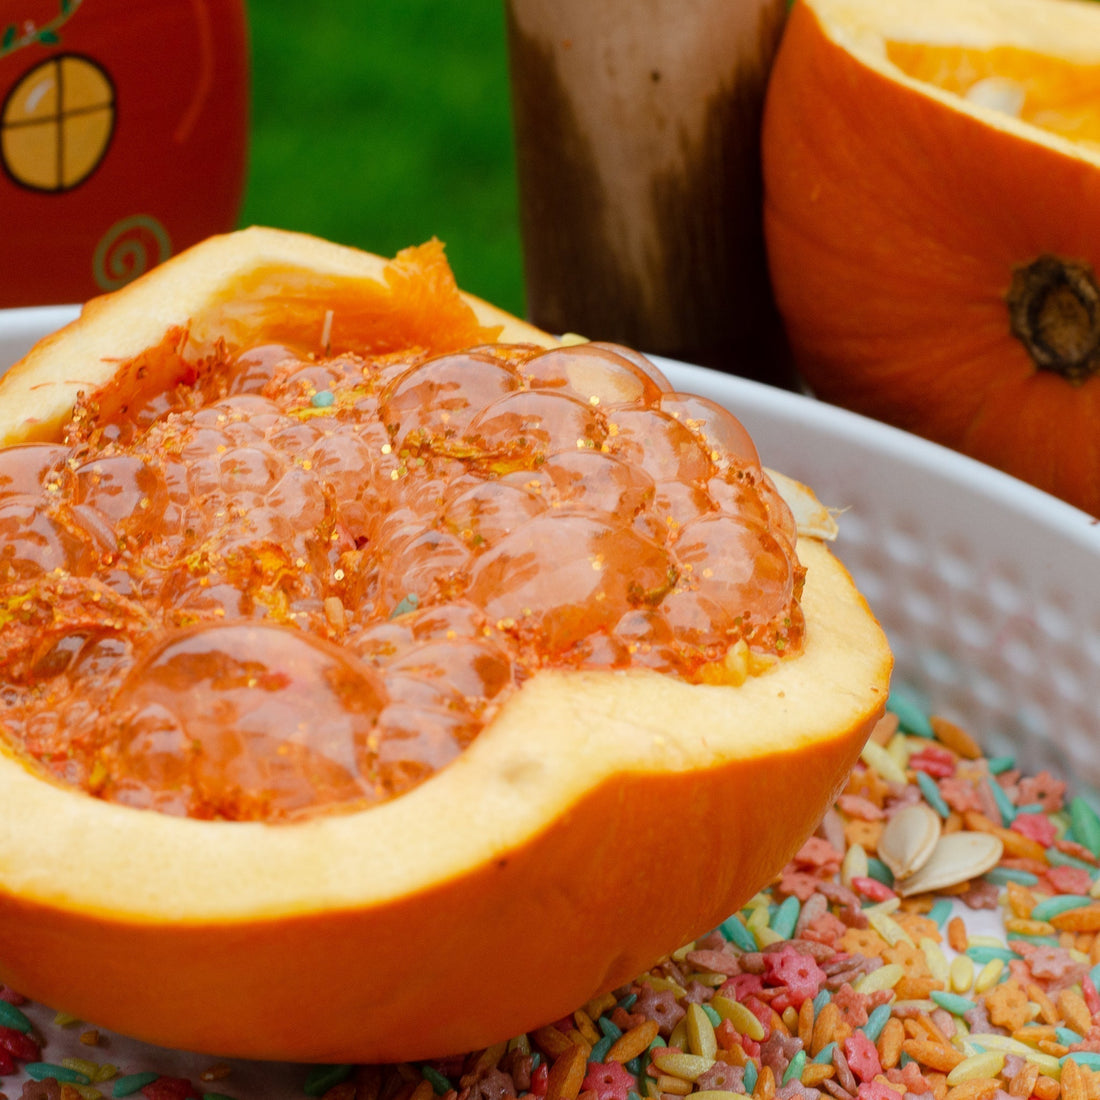
How to Use a Pumpkin as a Potion Play Vessel for Halloween
Share
Halloween is the perfect time to unleash your inner witch or wizard, and what’s more enchanting than a bubbling potion served in a carved pumpkin? Using a pumpkin as a potion vessel is a fun, festive way to bring spooky science to life for children and adults alike. This easy DIY project combines creativity, a touch of Halloween magic, and your favourite Cherry Bumbles Potion Powders. Whether you’re hosting a haunted party or looking for a family-friendly activity, here’s how to create a pumpkin potion vessel that will wow your Little Boos!
Why a Pumpkin Potion Vessel?
- Pumpkins are the ultimate Halloween icon, and turning one into a potion vessel adds a magical twist to your celebrations.
- The hollowed-out pumpkin acts as a natural cauldron, perfect for holding fizzy potions that bubble and fizz. Plus, it’s a great way to teach kids about science while embracing the spooky season.
- Extra potion ingredients - use those pumpkin seeds and gooey guts to add to your spooky potions!
Let’s get started with this bewitching project!
Materials You’ll Need
• 1 small to medium pumpkin (preferably with a flat base)
• Carving tools (knife, spoon, or pumpkin carving kit)
• Your Cherry Bumbles Potion Ingredients (Order HERE) or make your own fizzy potions (see recipes HERE)
• Optional: LED tea lights, glow sticks, or Halloween props, such as plastic spiders, wiggly worms, eye balls etc)
• A tray or towel for easy cleanup
Step 1: Prepare Your Pumpkin Cauldron
1. Choose Your Pumpkin: Pick a small to medium-sized pumpkin that’s stable when placed upright. Smaller pumpkins are easier for children to handle.
2. Carve the Top: Carefully cut a circle around the stem to create a lid. An adult should handle sharp knives.
3. Scoop Out the Insides: Use a spoon to remove the seeds and pulp. Save the seeds for extra potion ingredients or keep them away from your potions and roast them later for a tasty snack!
4. Clean and Dry: Wipe the inside with a paper towel to ensure it’s clean and dry.
5. Decorate (Optional): Carve spooky faces or designs on the outside, or add stickers, paint, or glow-in-the-dark tape for extra flair. If the pumpkin is too large, try cuting the pumpkin in half and brewing your potions in a wedge of pumpkin, instead of a whole pumpkin.
Step 2: Set the Halloween Scene
• Create a Spooky Setup by placing your pumpkin potion vessel on a table covered with a black tablecloth or fake cobwebs. Add props like plastic skulls, bats, or a witch’s hat.
• Engage Children by encouraging them to name their potions (e.g., “Zombie Slime” or “Phantom Fizz”) and act out a spooky story as they pour the ingredients.
• More than one child playing? Why not have a Pumpkin Potion Party!! Set up multiple pumpkin vessels for a “potion-making station”. Provide lots of potion ingredients and let guests mix their own brews. Include ingredients that create different effects, like our Potion Powders, Foaming Rocks and Fizzy Drops to guarantee lots of fizz, foam, bubbles and shimmer! Don't forget to add spooky props, like plastic spiders and wobbly worms!
Step 3: Magic Time!!
Add your potion ingredients to the pumpkin vessel and use pipettes to slowly add water. Then enjoy the magic!! Best Halloween/Autumn activity EVER!!
Safety Tips
• Supervise children during carving and potion-making, especially with sharp tools or ingredients.
• Avoid real candles inside the pumpkin—use LED lights or glow sticks for safety.
• Clean up spills immediately to prevent slippery surfaces.
Why This Activity Rocks
Using a pumpkin as a potion vessel is a budget-friendly, eco-friendly way to celebrate Halloween. It encourages creativity, teaches children about chemical reactions, and doubles as a festive decoration. Plus, it’s a great way to repurpose pumpkins after Halloween.
Ready to brew some Halloween magic?
Try this activity and share your spooky creations with us on social media by tagging us.
